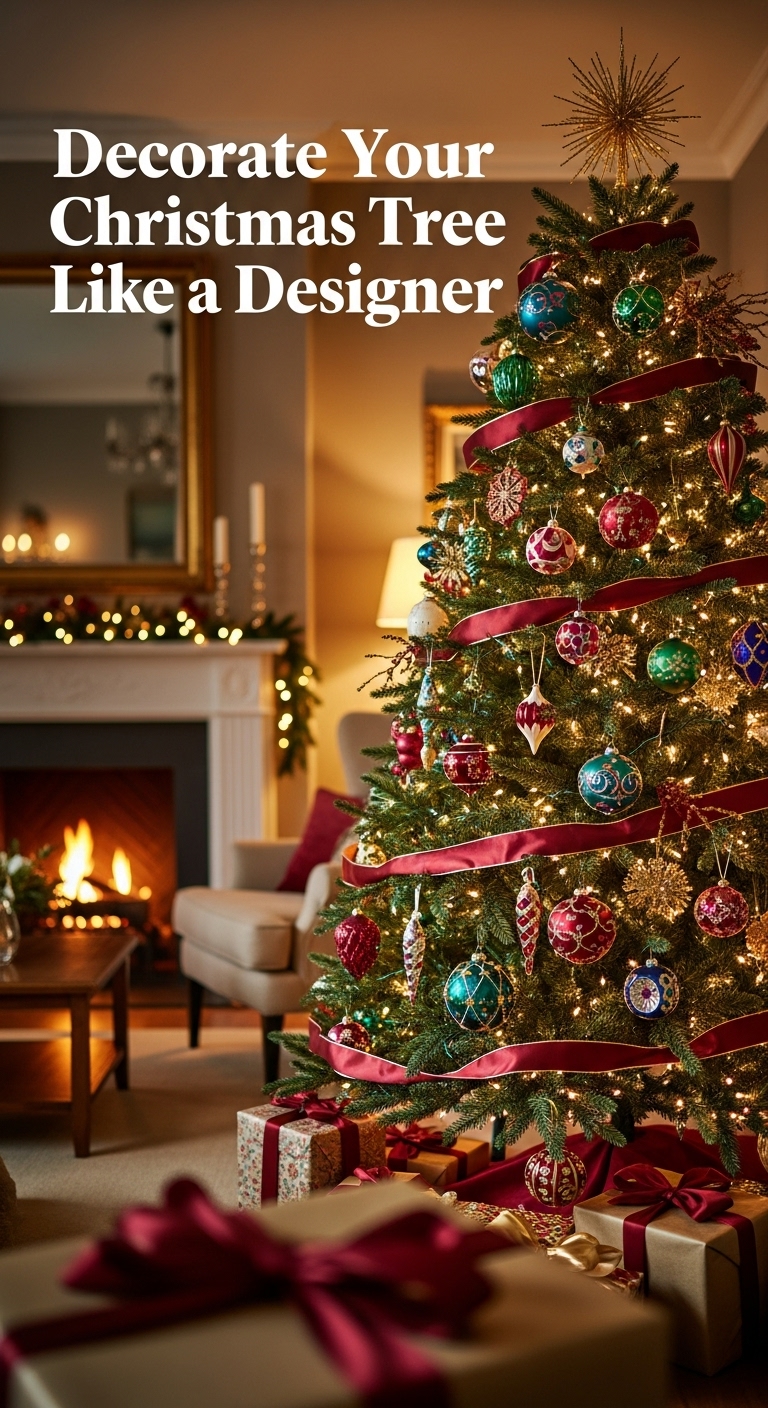
You want your Christmas tree to look like a perfect, magazine-worthy display. You know, the kind that makes guests pause and whisper, “Okay, who did this?” I get it.
I used to toss lights on mine and hoped that nobody scrutinized them. But once I figured out a few pro tricks, everything changed.
Let’s go through this together, like friends enjoying a warm, festive drink. 🙂
1. Start With the Right Tree Foundation
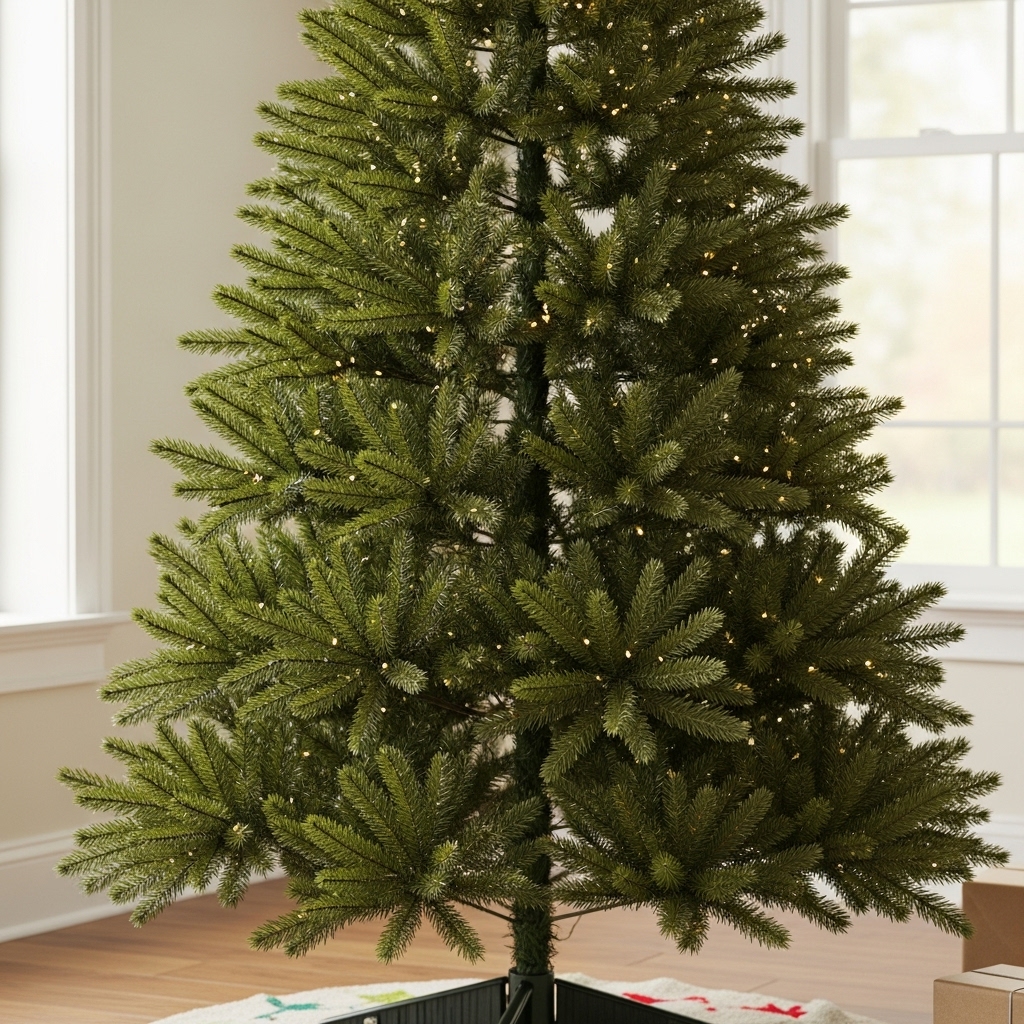
Before we talk about shiny ornaments and ribbon magic, we need to look at the tree itself. The tree forms the base of everything, so it matters.
Real Tree vs Artificial Tree
If you love the smell of Christmas and don’t mind a little sweeping, go for a real tree. If you want zero mess and something perfectly shaped, an artificial tree works beautifully.
Whichever you choose, check for:
- Full branches so it looks lush once decorated.
- A good height relative to your ceiling. You need space for that topper.
- A solid base or stand so your masterpiece doesn’t lean like it’s tired of life.
Ever seen a tree that looks tired and droopy? Yeah. Let’s avoid that.
Fluffing
This step feels boring, but trust me, it’s the secret to a professional-looking tree.
- Separate every branch.
- Fill in visible gaps.
- Shape it to look full and round.
Take your time here. You’ll thank yourself later.
2. Pick a Color Palette Like a Designer
Designers do not wing it when it comes to colors. They choose a theme.
Ask yourself: What feeling do I want? Cozy cabin? Elegant glam? Minimal Scandinavian calm?
Try One of These Stylish Palettes
- White + Gold + Glass: Soft, classy, clean.
- Red + Green + Plaid: Traditional and full of nostalgia.
- Black + Gold + Champagne: Luxe and mature.
- Blush Pink + Cream + Silver: Romantic and gentle.
- Wood Tones + Whites + Linen: Neutral boho vibes.
Stick to 2 or 3 main colors. Too many colors make the tree look busy instead of intentional.
3. Add Lights the Right Way
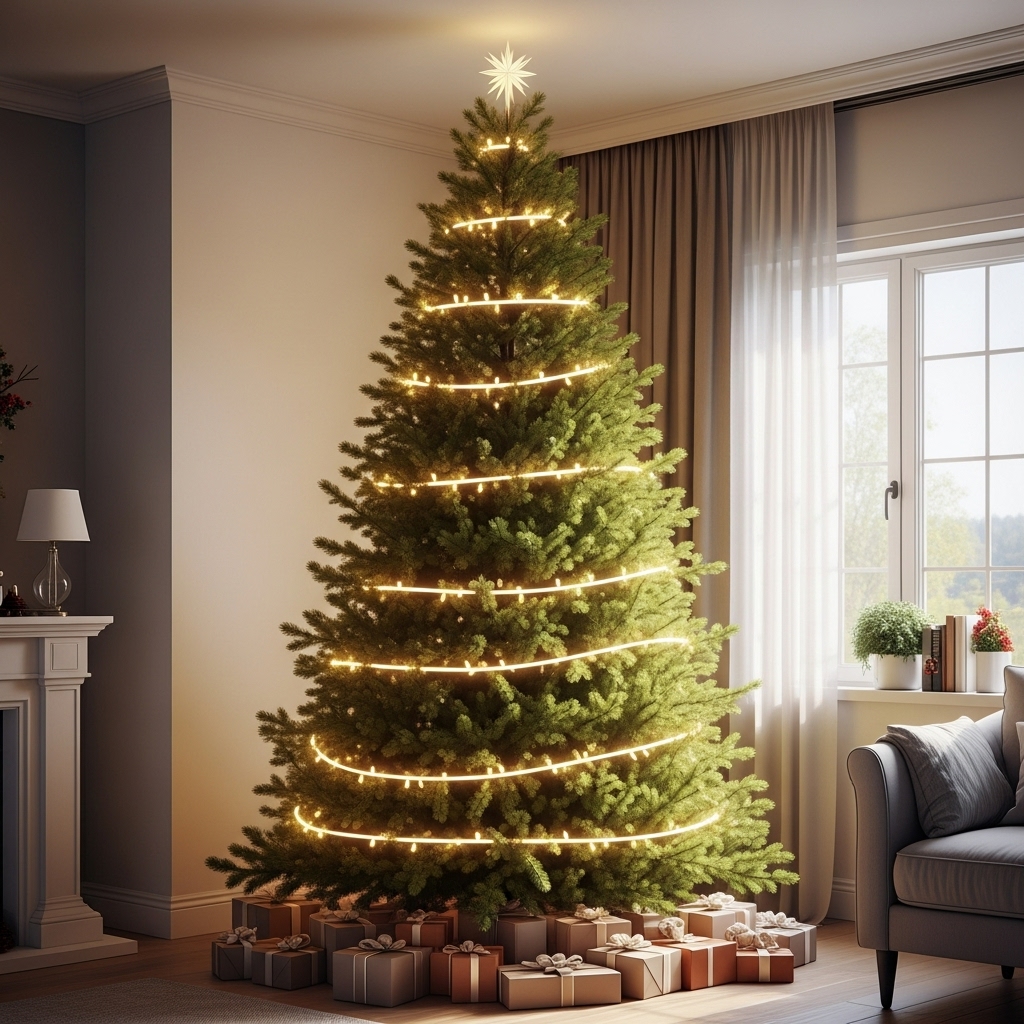
Lights set the mood. They make your tree look magical even before a single ornament shows up.
Pro technique: Always add lights from the inside out.
Start deep near the trunk and weave outward. This gives your tree depth and that warm, glowing sparkle.
How Many Lights?
A general guideline: 100 lights per 1 foot of tree height.
So, a 7-foot tree loves around 700 lights.
String slowly. Breathe. This part is actually relaxing if you don’t rush.
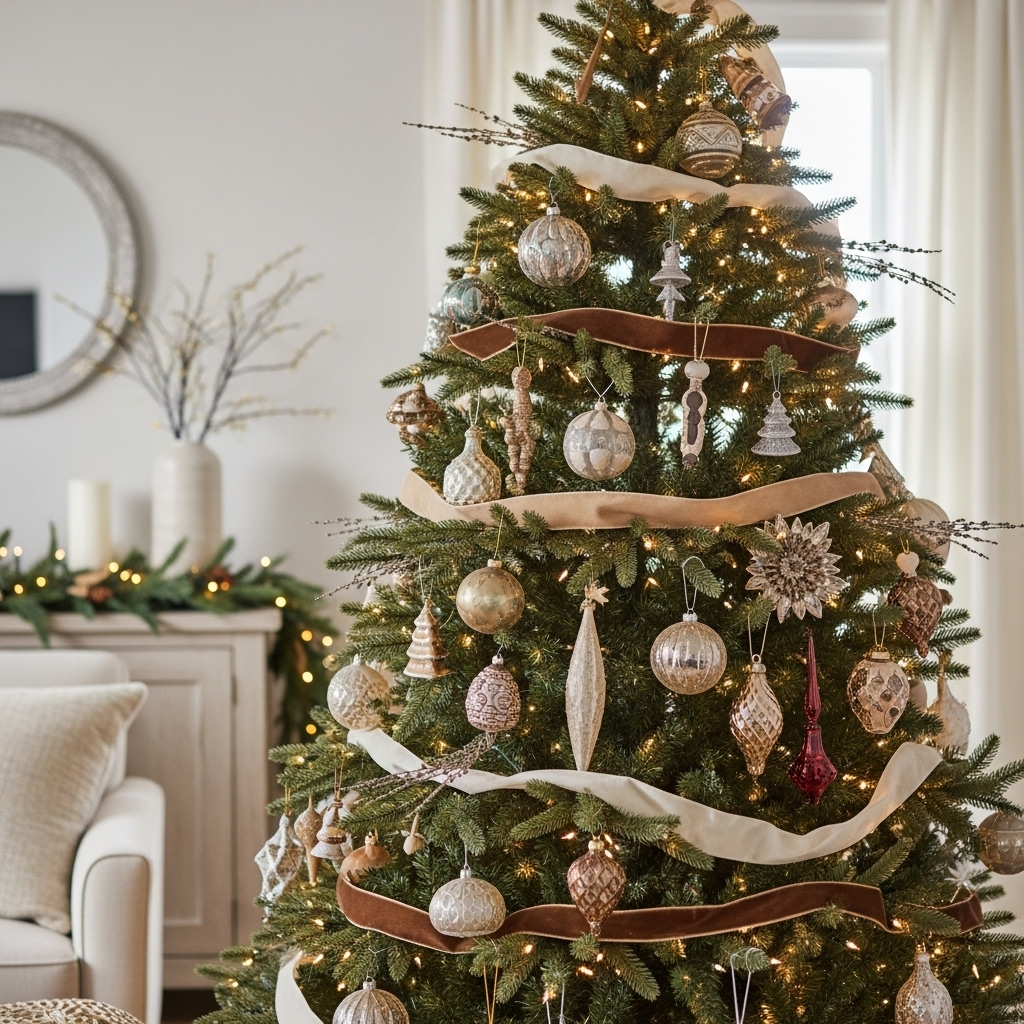
4. Layer Ribbon Like a Designer
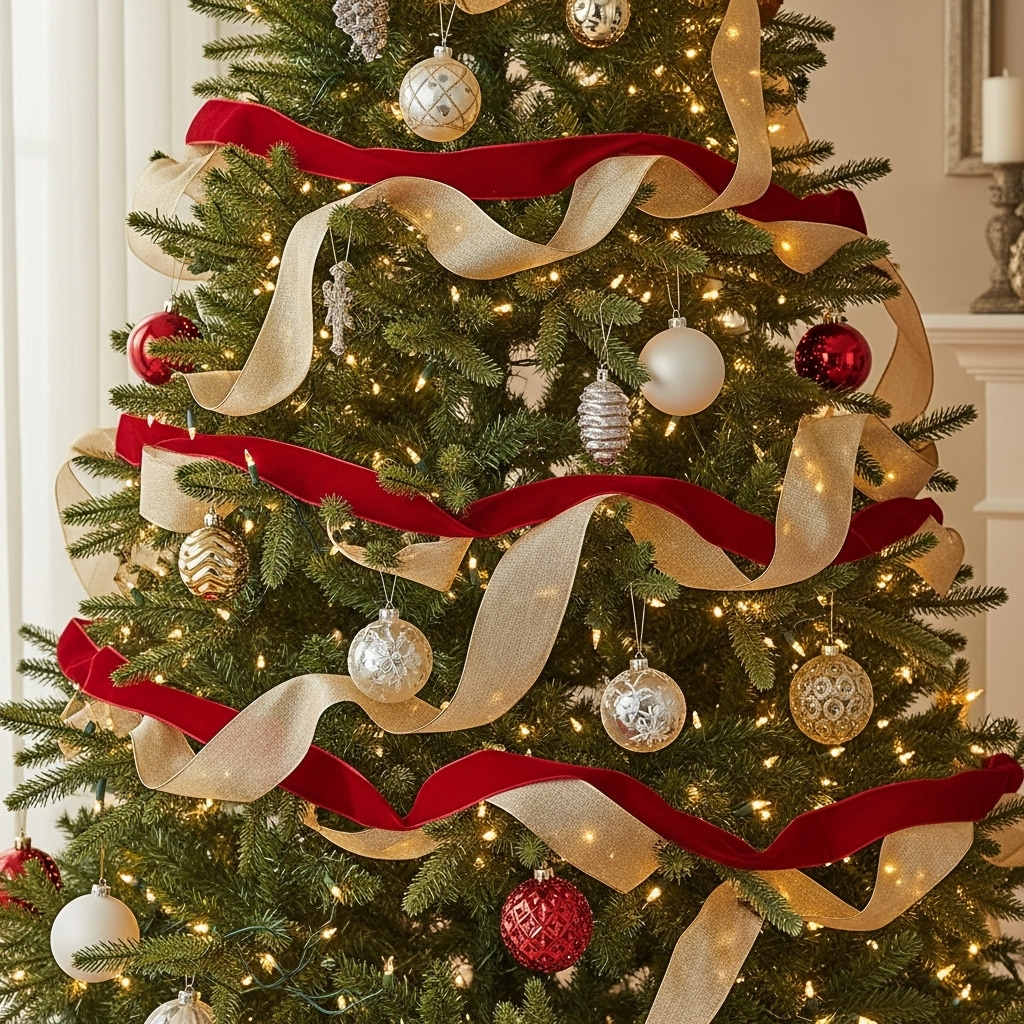
If you’ve ever tried throwing ribbon around your tree and ended up with something that looks like a tangled scarf, I promise, the issue wasn’t you. It was the method.
How to Do It
- Choose wired ribbon. Wired = shape control.
- Cut ribbon into 2–3 foot pieces instead of wrapping one long ribbon around.
- Tuck small sections into branches, letting them softly billow.
This gives that flowing, designer draped look.
Ribbon Placement Tips
- Use two ribbon types for texture variety.
- Mix patterns like velvet + sheer for depth.
- Place ribbon from top to bottom in loose waves.
Once you get this right, your tree already looks fancy.
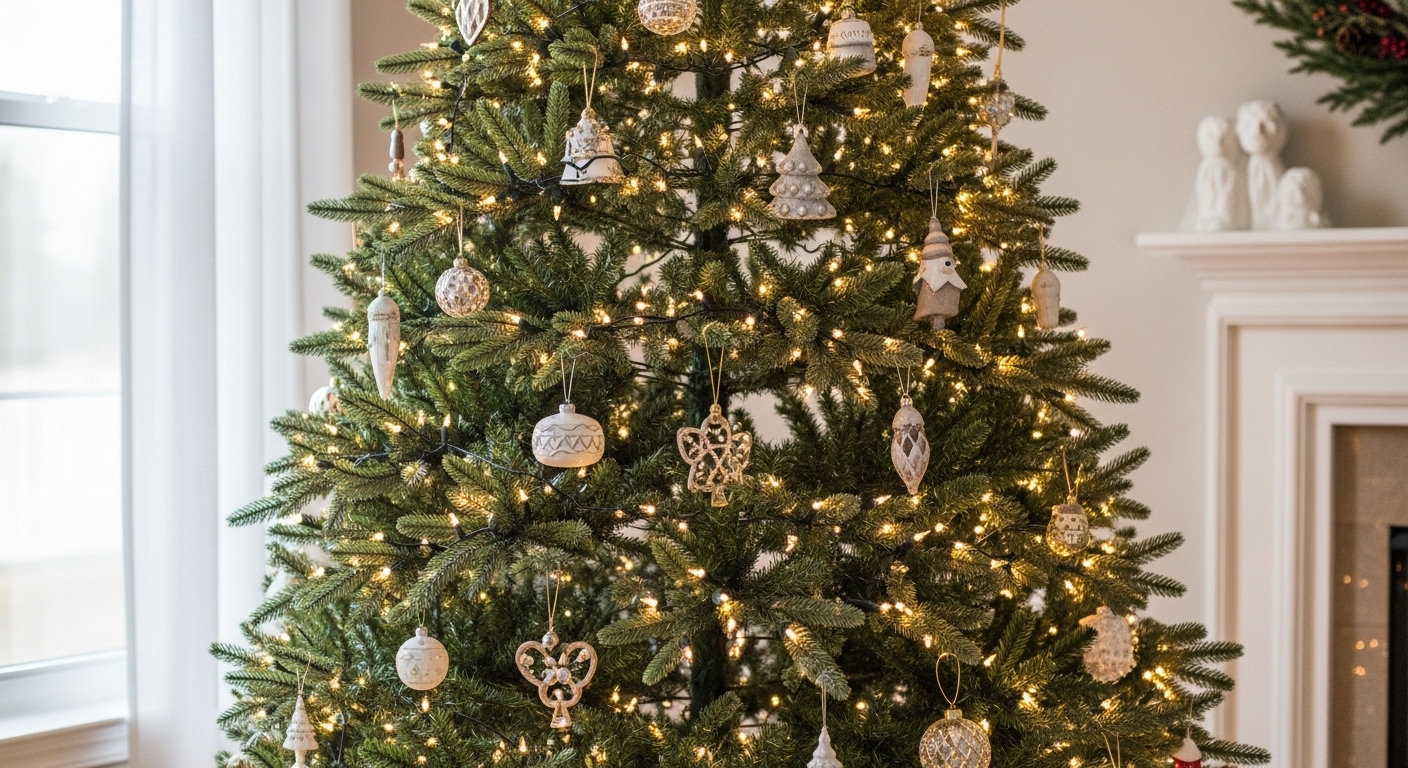
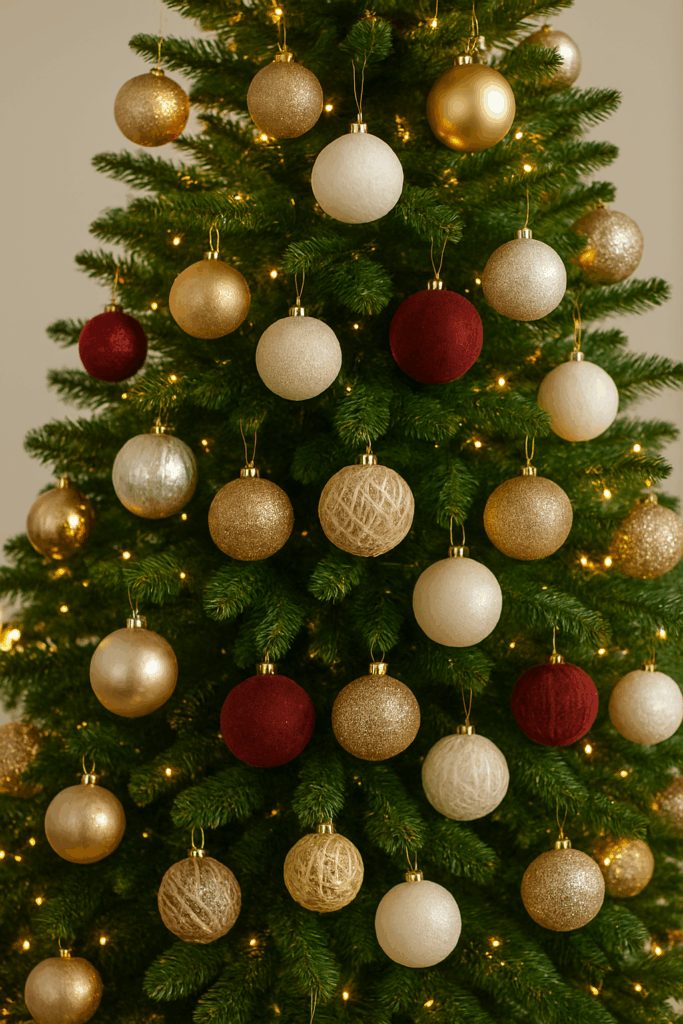
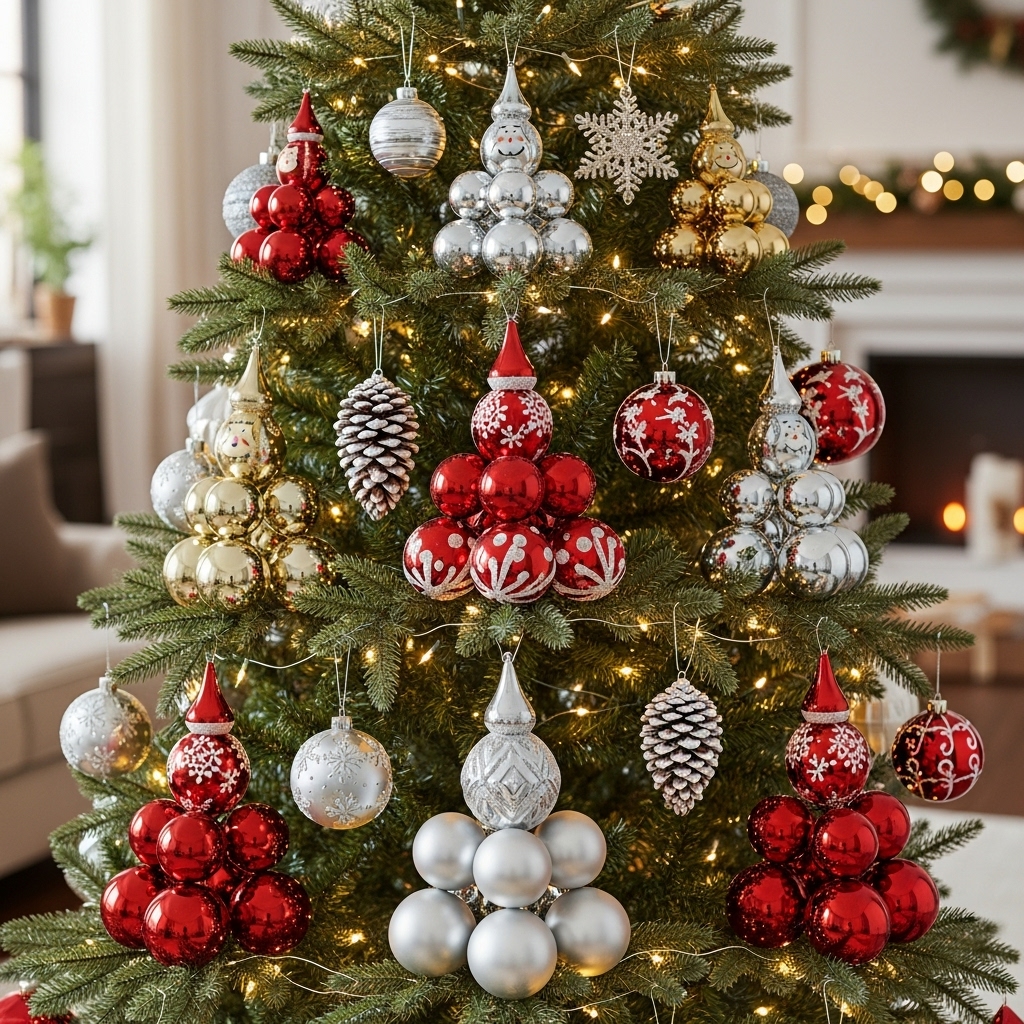
5. Decorate With Ornaments Using a Layered Strategy

This is the part everyone loves: hanging ornaments. But designers don’t just hang things randomly. They layer.
Designer Ornament Categories
- Large statement ornaments
- Medium filler ornaments
- Small detailed ornaments
- Textured pieces like wood, twine, velvet, beads
How to Place Them
- Start with the largest ornaments.
Place them deep in the tree to build depth and dimension. - Next, add medium ornaments.
Spread them evenly across the tree. - Finish with small ornaments.
Place them near the ends of branches for sparkle and detail.
Ever wonder why designer trees look so rich and full?
This layering technique does that.
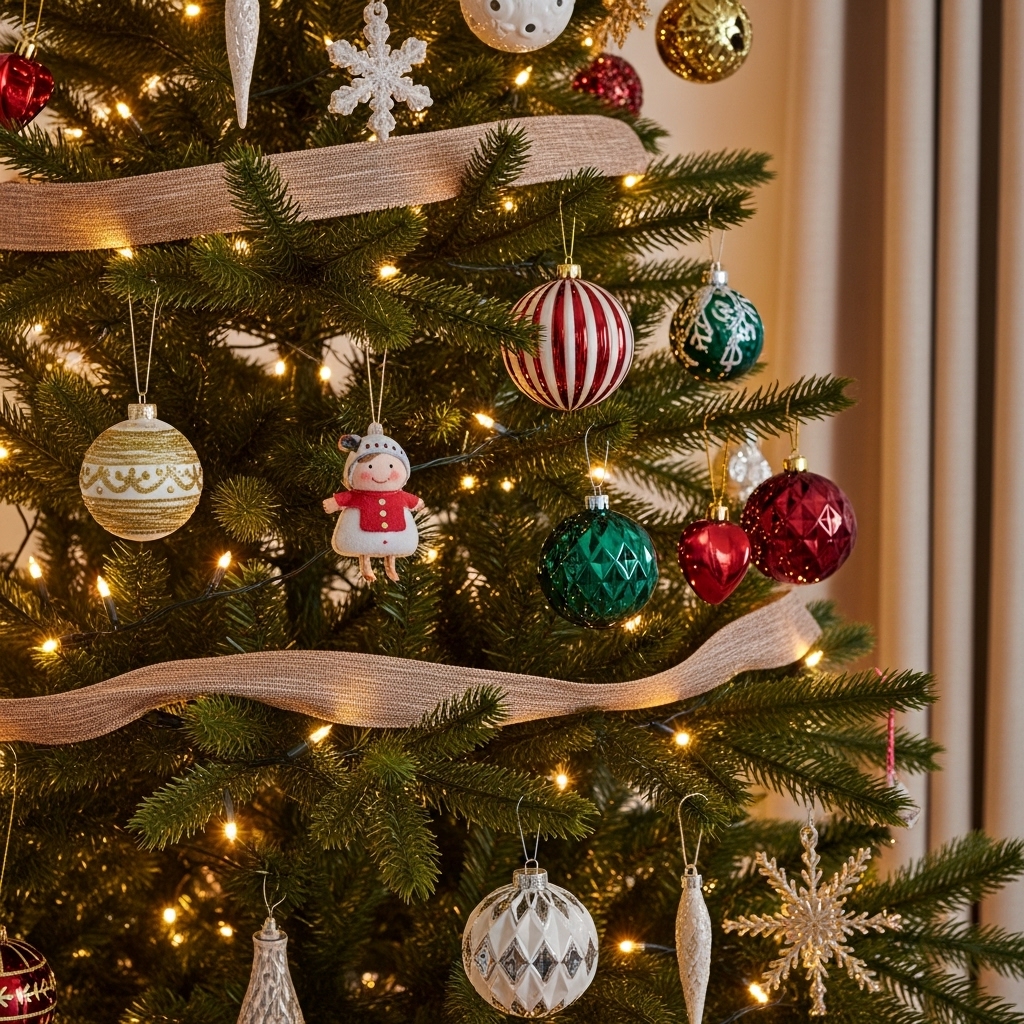
6. Mix Textures for a Professional Look
A tree covered only in shiny plastic balls looks flat. Designers use texture play to keep the eye interested.
Think about:
- Glass
- Velvet
- Wool
- Woven balls
- Glitter
- Matte finishes
Texture = interest.
If everything is shiny, nothing stands out.
7. Use Picks, Branches, and Florals to Fill Gaps
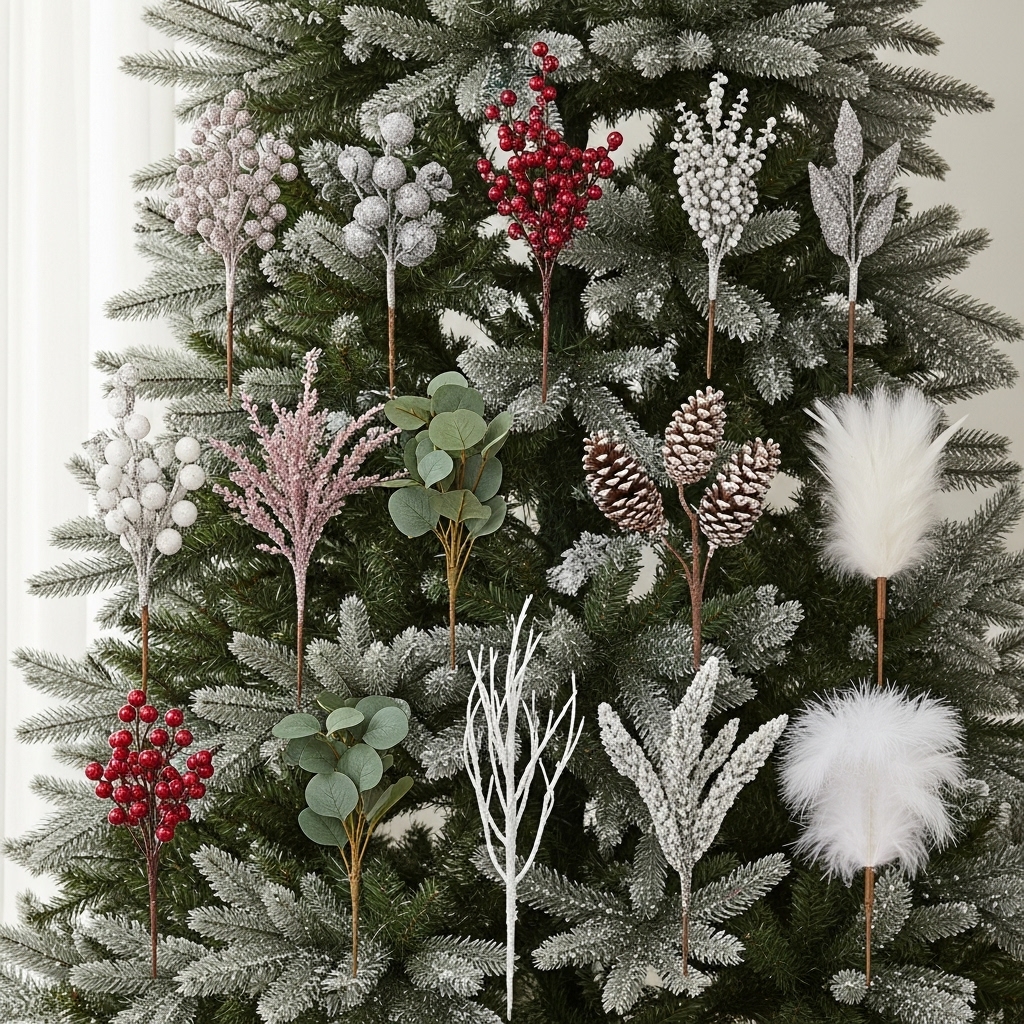
This step is where your tree goes from pretty to WOW.
Tree picks are small decorative stems you stick into branches. They add drama and volume.
Types of Picks to Try
- Glittered berry stems
- Faux eucalyptus
- Pinecones
- Snowy branches
- Feather sprays (very glam)
Place picks in clusters near the top and mid-sections. They extend the tree shape upward and outward, making it look taller and fuller.
8. Organize Ornament Placement in a Visual Triangle Pattern
Here’s a simple trick designers use:
Arrange ornaments in triangular groupings as you move around the tree.
This keeps balance and avoids weird clutter zones.
Never clump all your favorites in one spot. Spread the love.
9. Choose a Stunning Tree Topper
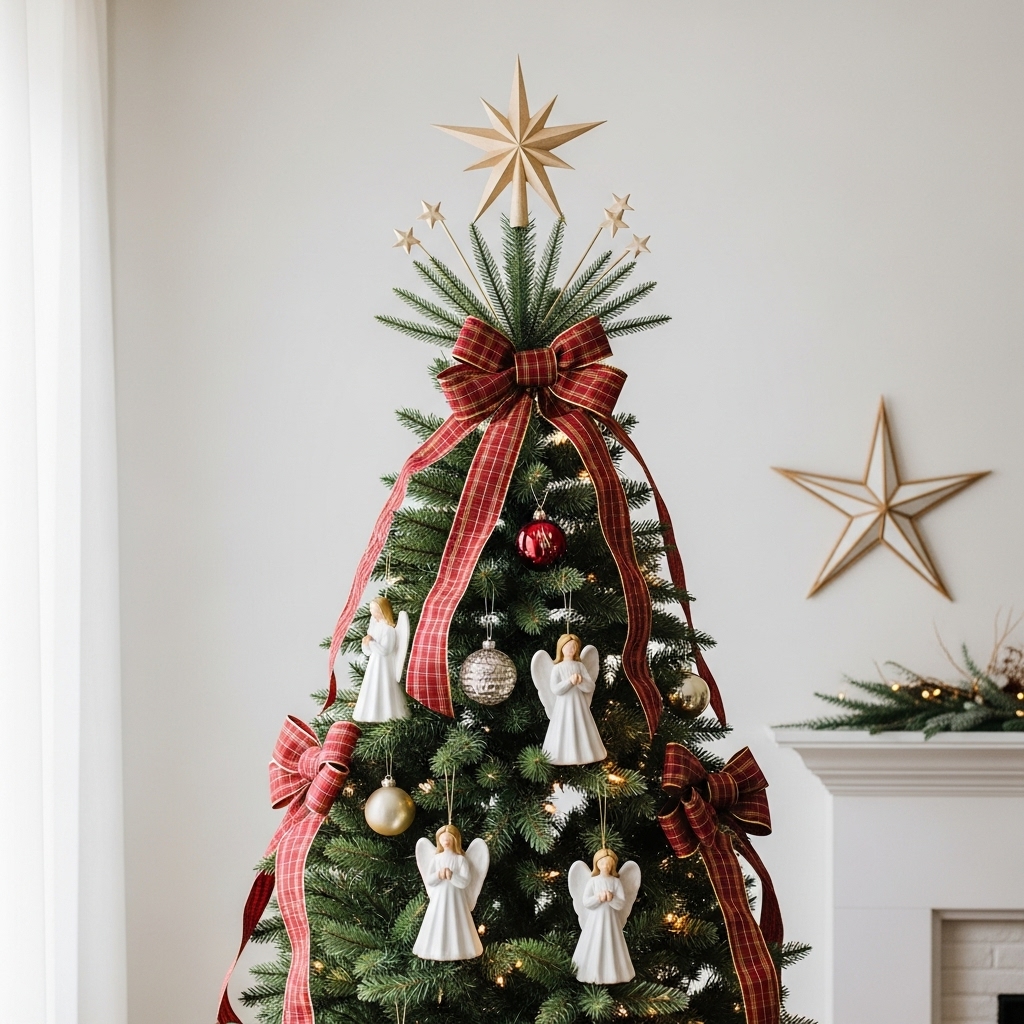
A topper isn’t just an afterthought. It’s the crown.
But please, don’t just plop a star on top and walk away (unless it’s a really nice star). Think volume and shape.
Try These Ideas
- Ribbon bows cascading down
- Star with picks fanned behind it
- Angel figures
- Minimal wood star for Scandinavian vibes
Just make sure your topper flows into your decorating style.
10. Finish With a Tree Skirt or Collar

The bottom matters. Without something to anchor the base, your tree will look unfinished.
Options That Look Designer
- Woven tree collars for a structured look
- Velvet tree skirts
- Linen neutral drapes tucked tastefully
Avoid anything that looks too wrinkled or thin. Think plush and intentional.
11. Step Back and Edit
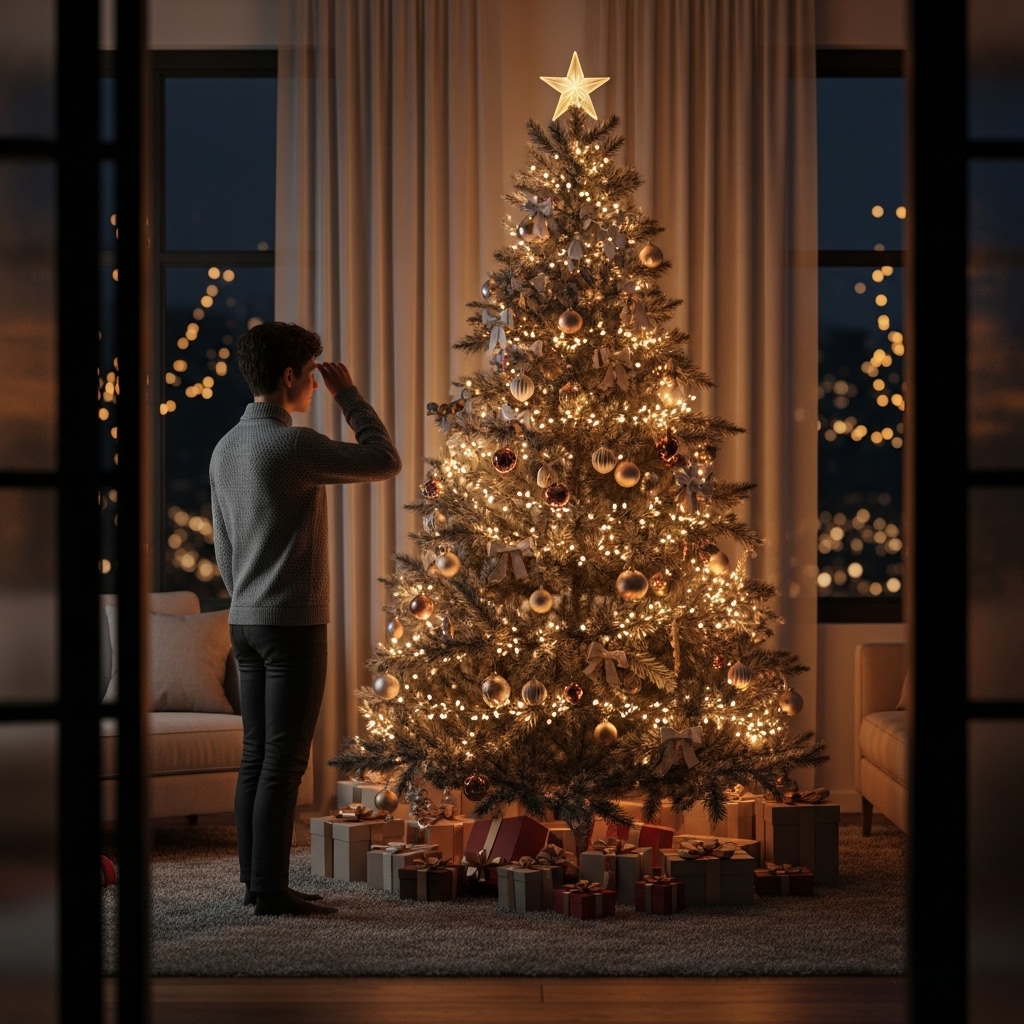
This is the secret nobody talks about.
Stand across the room. Squint slightly. Look at where the visual weight sits.
Ask yourself:
- Do I see any bare holes?
- Do colors appear balanced?
- Does anything feel crowded?
Make tiny adjustments. Tiny adjustments = huge difference.
Quick Tip
If something keeps annoying you visually, trust that feeling. Fix it. You know better than you think. IMO, the eye always tells the truth. 🙂
12. Add a Personal Touch So Your Tree Feels Like You
A designer-looking tree shouldn’t feel cold or generic. It should feel yours.
Consider adding:
- Ornaments collected over years
- A tiny handmade ornament from childhood
- A keepsake from travel
- A ribbon in your favorite texture
Design matters. But personality makes magic.
Final Word
Decorating a Christmas tree like a designer isn’t about copying what you see online. It’s about intention, layering, and flow.
When you pick a palette, place ornaments thoughtfully, mix textures, and allow personality to show, your tree tells a story.
And honestly, that’s the real beauty.
So, this year, don’t rush it. Put on music you love. Take your time. Enjoy the process.
Because when you step back and see that tree glowing like something straight out of a holiday movie, you’ll know you created something special.
Now go make something magical. 🎄